Introduction
Welcome to Nabtech knowledge base! This comprehensive guide will walk you through the detailed step-by-step process of installing WordPress in cPanel using the Softaculous Apps Installer. WordPress is a powerful and popular content management system that will help you create a stunning website with ease. Let's dive into the installation process to get your website up and running!
Step 1: Accessing cPanel
- Log in to your Nabtech Hosting account using the provided cPanel login credentials.
- Once logged in, you will be directed to the cPanel dashboard, which is the control center for your website.
Step 2: Locating Softaculous Apps Installer
- Scroll down to the "Software" section in cPanel.
- Click on "Softaculous Apps Installer," a user-friendly tool for installing various applications, including WordPress.

Step 3: Selecting WordPress for Installation
- Inside Softaculous, find and click on "Blogs" in the left sidebar.
- Look for "WordPress" in the list of available blogging platforms and click on it.

Step 4: Initiating the WordPress Installation
- On the WordPress overview page, click on the "Install Now" button to begin the installation process.
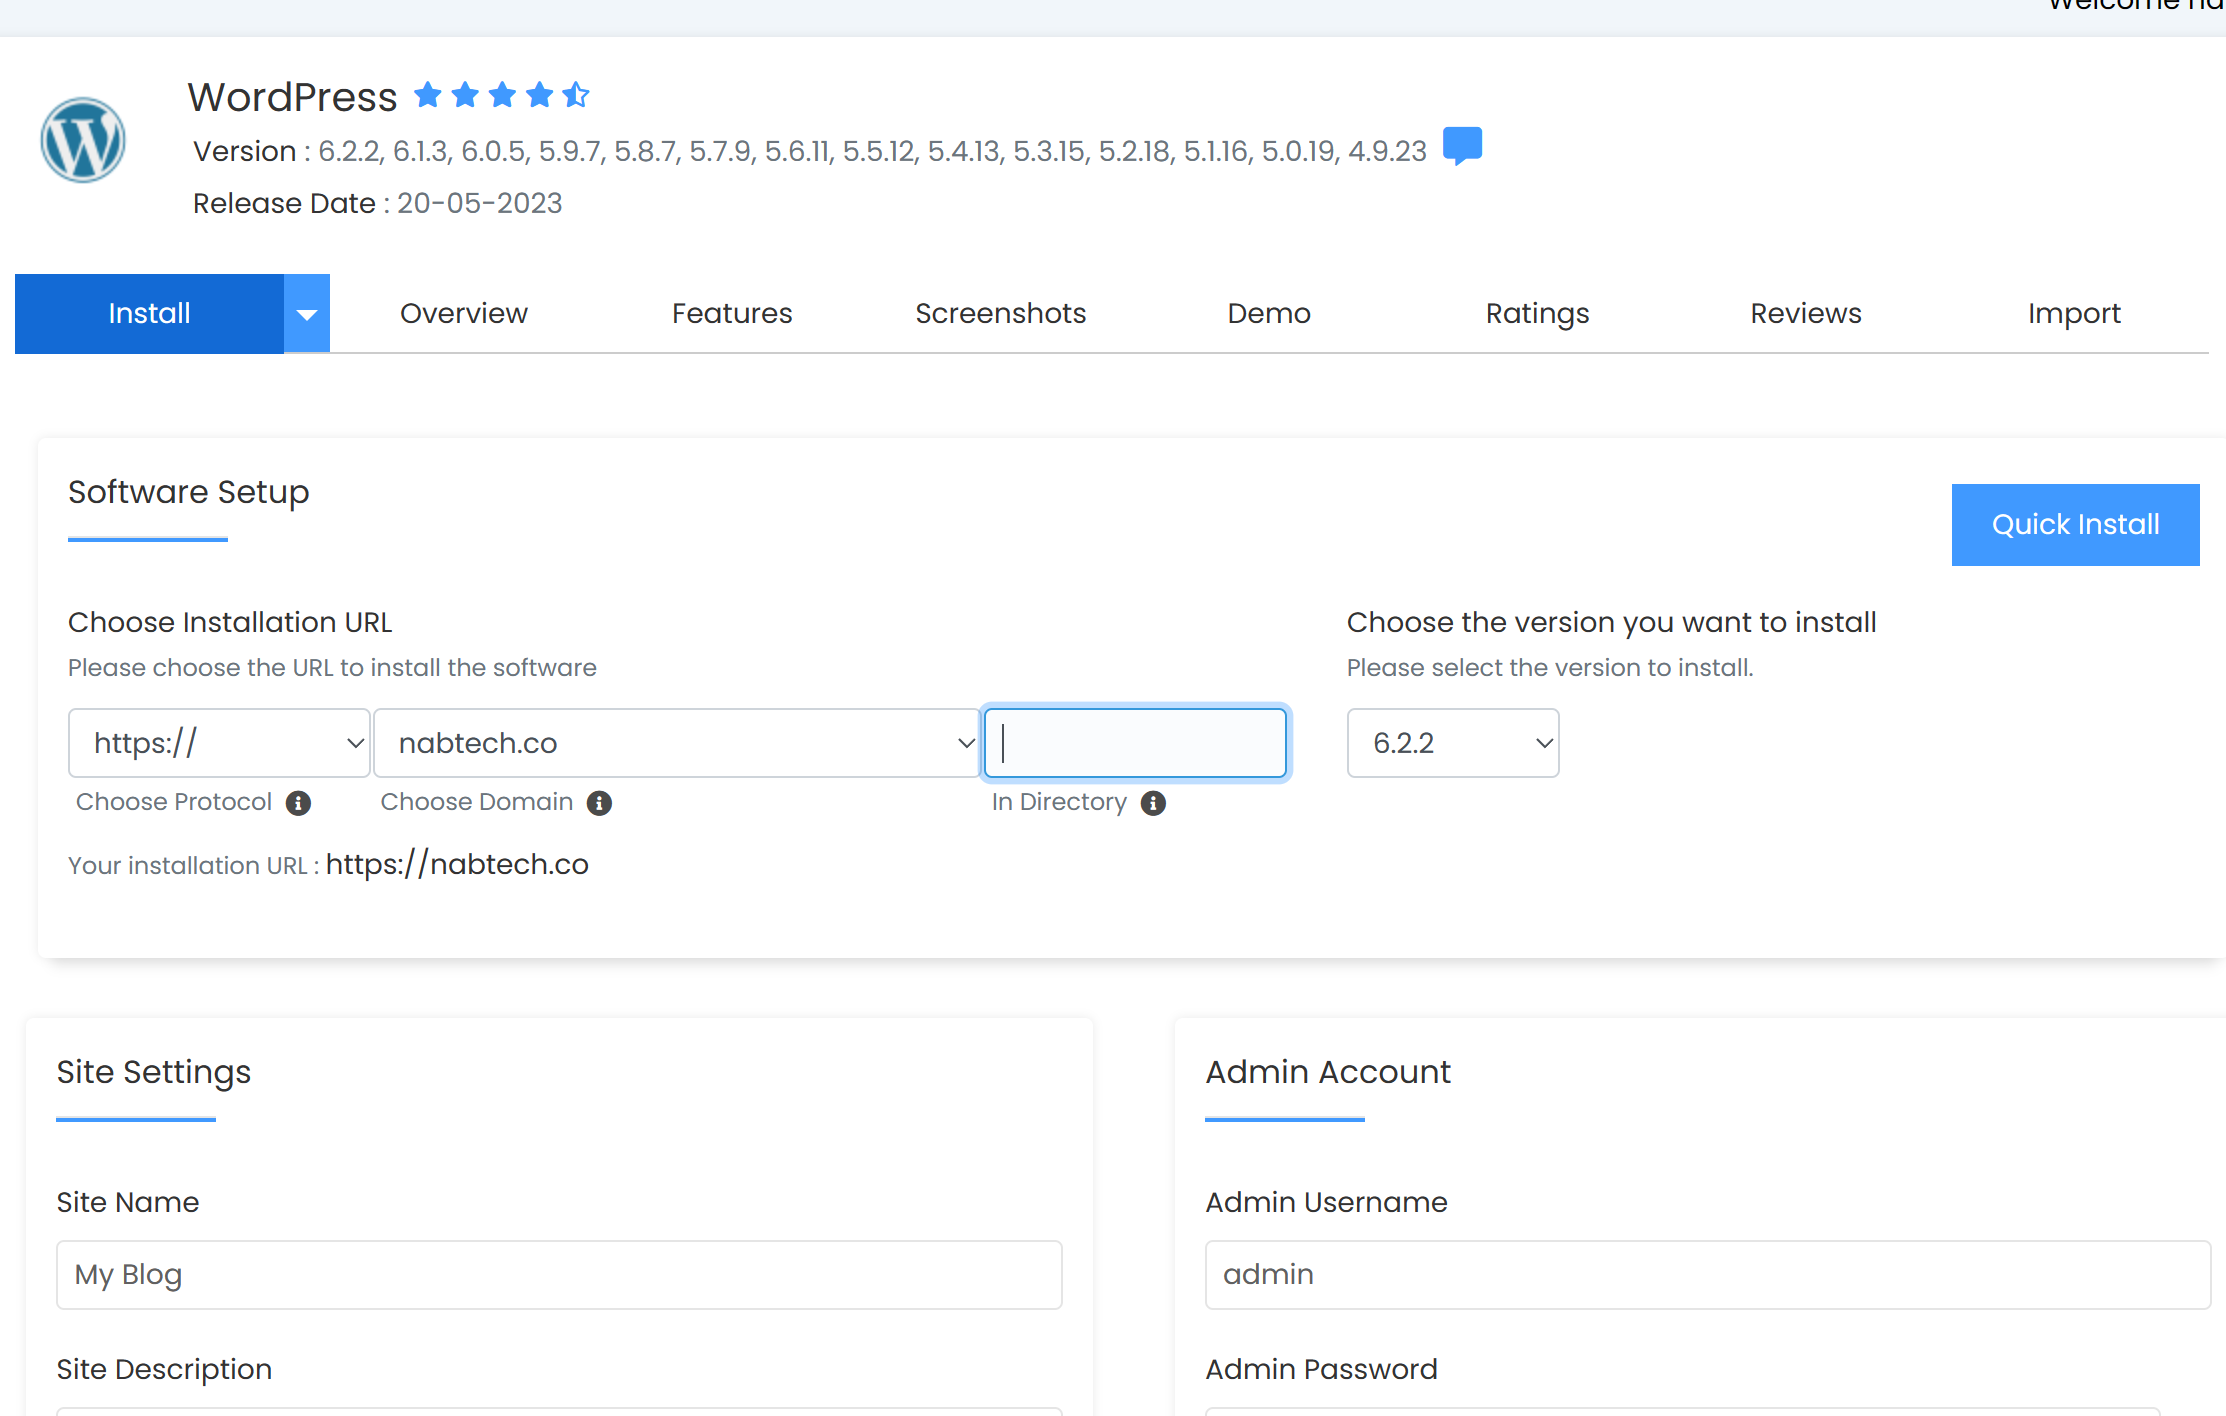
Step 5: Configuring WordPress Settings
- Provide the necessary information for your WordPress installation:
- Site Settings
- Choose Domain: Select the domain where you want to install WordPress from the dropdown. If you have only one domain, it will be pre-selected.
- In Directory: Leave this field empty to install WordPress on your domain's root (e.g., https://yourdomain.com/). If you prefer a subdirectory (e.g., https://yourdomain.com/blog/), enter the desired name.
- Site Information
- Site Name: Enter a name for your website.
- Site Description: Add a brief description of your website.
- Admin Account
- Admin Username: Set a secure admin username.
- Admin Password: Create a strong password for your admin account.
- Admin Email: Enter an email address to receive important notifications from your WordPress site.
For other settings, Softaculous provides recommended configurations, which you can keep as is.
Step 6: Initiating the Installation
- Scroll down and click on the "Install" button to start the installation process.
Step 7: Verifying the Installation
- Softaculous will now install WordPress on your chosen domain.
- Once the installation is complete, you will see a success message along with links to your new WordPress site and the admin panel.
Step 8: Accessing Your WordPress Dashboard
- To access your WordPress admin dashboard, click on the provided admin panel link.
- Log in using the admin username and password you set during the installation.
Conclusion
Congratulations! You've successfully installed WordPress on your website. Now you can unleash your creativity and start building your dream website using WordPress's powerful features and customizable themes.
Remember that Nabtech support team is always ready to assist you with any queries or concerns you may have. Happy website building, and we look forward to seeing your online presence thrive with Nabtech! ????
.png)
 (1).jpg)
 (1) (1).png)
 (1).png)
.jpg)
.jpg)

 (1).jpg)
.jpg)